
Hey guys!
So recently I have put the finishing touches to a short animation I have been working on over the past month or so. Or at least, that is, the first 20 seconds of it. You see, the piece is entered as part of an Animorsels challenge, and they only want to see 20 seconds of work. My aim is to make the final piece about a minute in length, so yeah, still got a lot to do on it.
That being said, I am really pleased with what I have been able to create – from scratch – and am raring to show you guys what I have been up to.
But first a little background.
You see, I work in fully immersive content creation. That’s basically a fancy way of saying I produce animation for full domes (or planetariums) and VR. My desk at work has an Oculus Rift set up so that I can test out bits and pieces, be those real-time experiments using Unity, or 360 Animated Videos rendered out from 3Ds Max.
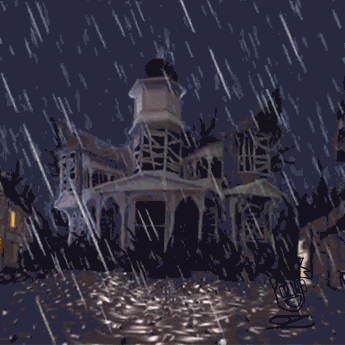
With a good knowledge of rendering 360 spherical renders, I figured that for this particular Animorsels challenge – MONSTER! – I wanted to place my audience in the middle of the scene, fully immersing them in the ambiance and setting I was to create.
On making a creepy street.
I would be the first to admit that I am not the best modeler in the world.
I would also be the first to admit that if I was to model something, it would probably be organic, and nothing to do with architecture.
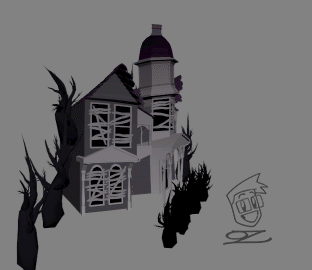
But I really wanted a spooky street and haunted mansion (I have been playing a lot of Mansions of Madness and learning how to play the Call of Cthulhu RPG, so pretty much had a set scene in mind), so I decided to get over myself and give it a go.
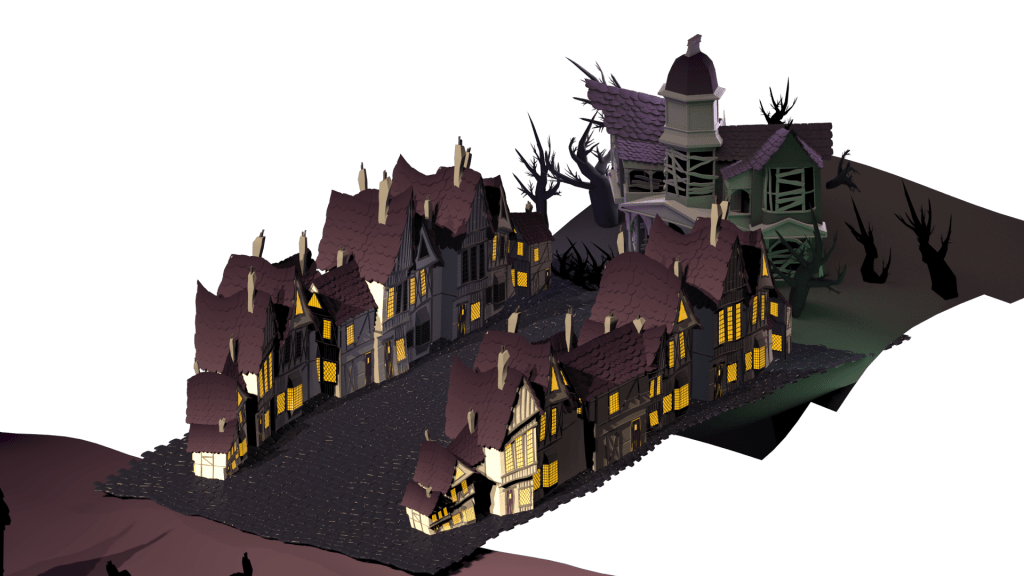
I started by creating a series of standard pieces – mainly bits of wood, which I could then kitbash together to make one building with each of it’s four walls having a different design.

Using this as a basis, I started throwing together new bits of geometry, creating something that resembled the traditional Hauted house look that I was after. Knowing I would only see it from one angle gave me agency to create only what I wanted to see, not needing to bother about the back side. I surrounded it with craggy trees and boarded up the windows.
With these models in place, I assigned some very basic VR Materials to them, and started to assemble my street.
FFDs are marvelous things.
And here’s why – you can duplicate a single cobblestone many many times, and twist them all together, shaping irregularities to make a more natural looking cobblestone road. Now I am not claiming that my cobblestone road looks natural, as such, but you get my point. Maybe ‘interesting’ is the word I should use.
In addition, you can use the same building again and again, using the glories of FFDin’ to create variety, allowing for a more interesting looking street.

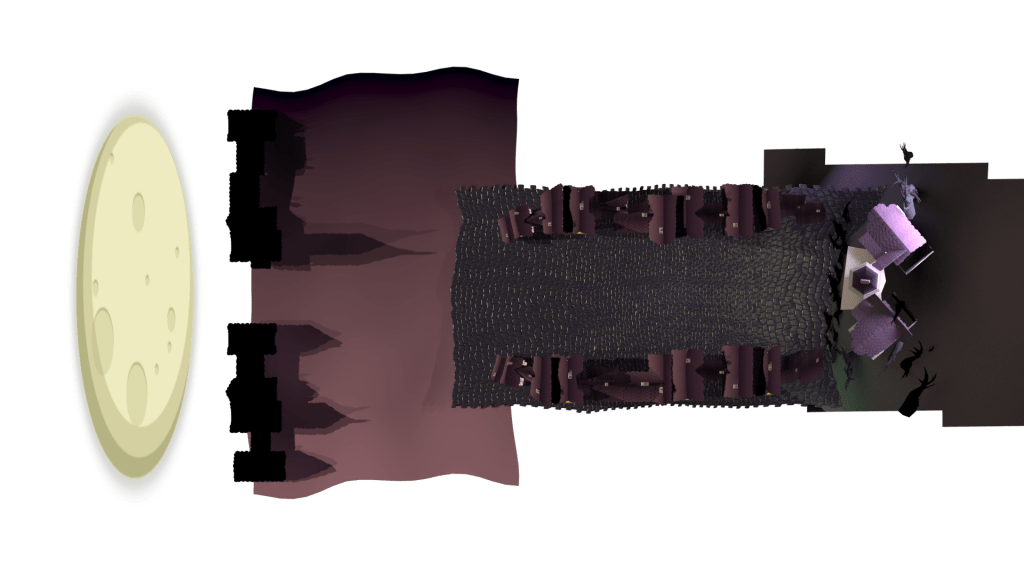

I drew a couple of circles in Photoshop and placed the very moon in the sky! I threw in a few lights (which was interesting to consider for a 360 view of the scene) which can be seen in the pictures above. But there was something else I needed to give this beaut the atmosphere I desired – A heavy downpour.
Now, in the same way that I would be the first to admit that modelling (especially architectural modelling) isn’t my thing, it would be wrong of me to forget to mention Particle Systems in the same breath. So I suppose up to now I have been pushing the boat out a bit, experimenting with a few new things, which is nice.
TyFlow is a surprisingly elegant particle system within 3Ds Max. It works similarly to PFlow, but with a couple of distinct differences. Or at least that’s what a colleague of mine told me – he knows these things, i don’t, so I trusted his judgment.

The set up is a simple one – produce many stretched-out oblong particles over the course of the animation. when they collide with a rough floor/building geometry I built, turn into a spherical shape to give a little splash effect, then kill the particle. I gave the whole thing a translucent material with a fall off to avoid it raining through the camera (near), and muddying the view of the distance (far).
Finally I wanted some lightning.

I found some totally free to use Heavy Rain and Thunder sound effects online, and designed a soundscape, editing it together in Premier Pro. Using this sound as a template, I animated the strength of one flooding light from nothing to an extreme, shifting the light from position to position as I went, as though the storm was all around us.
When it came to rendering, I realised that the stark black and white effect I wanted for my lightning wasn’t something I would get in one render. So I rendered the street in full colour on one layer, and the lightning on black geometry on another. I brought them into After Effects and played with some values to get the stark flashes and distant illumination I wanted.
360 Video Tests
Here is a link to the minute-long thunder test. if you get the chance to watch this on your phone, have a good look around. Better yet, check it out using a headset like Oculus or Google Cardboard. I dunno how you’r do that from YouTube though…
In order to get it working as a 360 video on YouTube, I found that Facebook has a great 360 Director tool in which you can upload a spherical video, and download it encoded to play as required.
On the whole, I was really impressed with the scene I had set up. It took me far longer that I had hoped, and so was really looking forward to doing some character stuff in the scene!
But I will talk about that next time!
If you’ve made it this far, good on you! Thanks for reading!
Oz
