PRODUCTION DIARY OF [CENSORED DUE TO NDA] – WEEK 4 – Smacking Ones Head Against UE4.

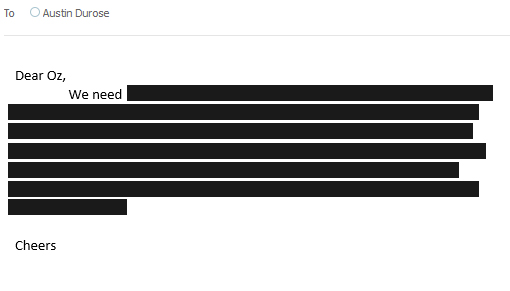
Calamity Joe, the smart git, chose to do all of his Cinematic work directly in UE4.

I mean, ok, he is a young intern fellow, full of optimism and willingness to learn. So the opposite of myself. I have over 8 years experience in the animation industry. I am used to animating every detail in Maya (or 3Ds Max) and rendering it out from there. I am used to the standard 30fps, some room for editing and tweaking things in post.

Great stuff.

Do I know games engines? No.

Or at least I didn’t.

Not until about 6 months ago when I was rudely dropped into Animation Blueprints and a whole world of ungodly foulness that felt like playing with lego, blindly in the dark expecting something magic to happen when you turned the lights on. And now something completely different: Sequencer.

BluePrintA
An Animation Blueprint. This sequence of nodes tells the character to do something, apparently.
BluePrintB
Another Animation Blueprint. This sequence of nodes tells the character to do something else.

Now I have to admit, after a little while of pretending to be a Technical Animator (that is to say someone whose job it is implementing individual animations into a game), I managed to learn quite a bit, though I still wasn’t sold on it as a career direction.

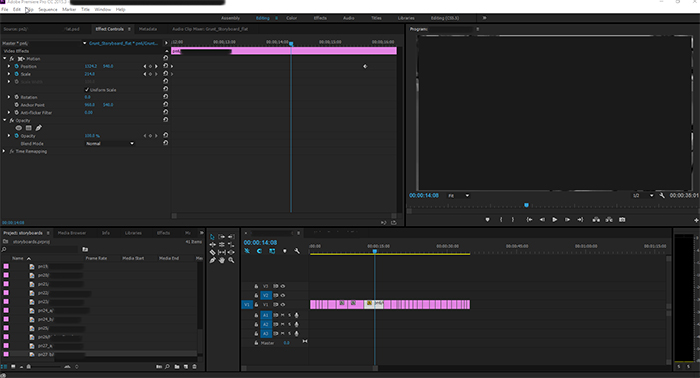
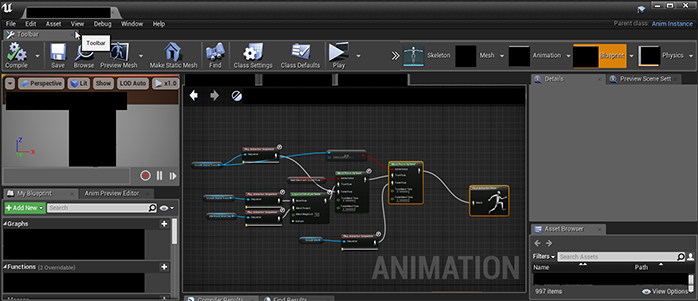
Unreal Editor’s Sequencer

In UE4, the Sequencer Editor gives the user a way to create and edit in-game cinematics. You are given a simple timeline within which you can import “Shots” – other timelines which hold any information specific to that shot. In these “Shots” you would have any actors you need (and in this case actors means anything doing something – ie, characters, cameras, particle effects, ect), and manipulate them as you wish. Each Actor is represented as a new layer in the shot’s timeline, and you can add any property belonging to that actor as an animatable “Track”. By means of an example, say your actor was a light that you wanted to move into a certain position and blink. You would add a ‘Transform’ track, which holds all of the translation and rotation information, and a ‘Light Intensity’ track to control how bright the light is.

Sequencer
The sequencer with a few Keyframes. Censored due to NDA, Obvs.

With these individual tracks, you can now scrub your way through the timeline, stopping where you want something to happen, add a keyframe with a click of a button, and boom, you’ve got your simple animation, you lucky devil, you!

Now this is all pretty basic from an animation point of view. Sure, it is really impressive to chop and edit shots with other shots without having to shift a bajillion keyframes from one place to another, and yeah, the addition of its own curve editor makes it really easy to manipulate the flow of each animation track, but that’s just like playing with After Effects, only fully in 3D.

Sequencer_Curves
The curve editor, showing some of it’s tasty curves.  This is actually better than the After Effects curve editor, if you ask me.

When it comes to character animation, though, it is definitely worth doing all of that in Maya or Max. Do you’re little walk cycle, or little fight sequence or whatever, and export each character’s animation as you would for normal games animation. You can then add this whole animation as a block into one of the shots. In fact you can add two animations as blocks into a shot! Screw it! have as many animations as you want, coz you can blend between them! Want your walk to turn into a fight scene? Simple, blend it! Don’t like where your actor is walking? Fine, animate it’s transform track and deviate his movement. The more I think about this, the more I am impressed by it and consider it a great tool for getting together some quick and easy animations.

Issues

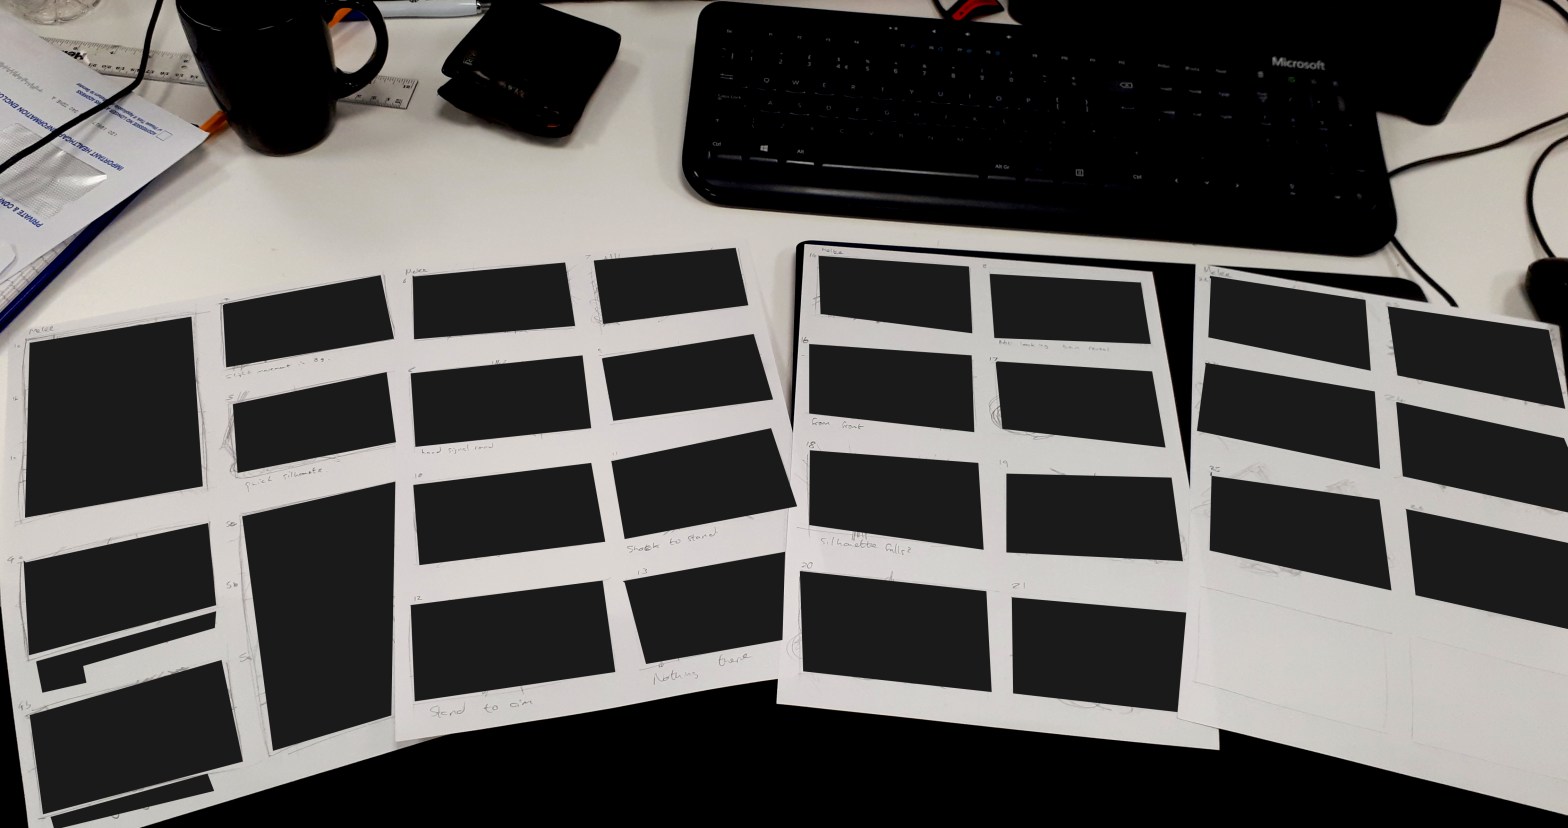
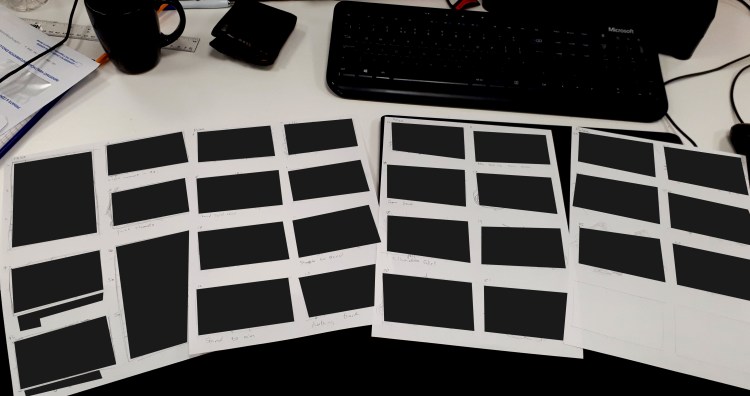
Unfortunately it’s not as simple as that, not for me anyway. Being well established in my ways, there were things I wanted to do that I couldn’t. Or I could, but the entire thing was hacky or clunky to use. Simple things like making the viewport show you EXACTLY what you’re render will see, setting up and locking a frame dimension that won’t scale weirdly as the viewport changes. Getting the viewport to show me the Field of View on a per-shot basis was my biggest frustration. I had a lot of shots that worked well in Maya, with the camera position and field of view set up. However easy translating that info into UE4 was, scrubbing through just seemed to stick with one FOV. It was only when I rendered the sequence that I realised this wasn’t the case.

I had it on occasion when certain actors not placed into certain shots would find their way in there anyway, standing T-posed in the middle of the action. Once again, this would not come up in the viewport, but render only. To get ride of these, I had to turn the actors invisible.

Lastly, due to the nature of games engines which run in terms of seconds rather than frames, there is a slight motion blur flash when actors step from one position to the next. This is most prominent on the cuts, where the master camera is moving from one position to the next. Unfortunately I don’t have the time to troubleshoot this issue, and so will have to throw the rendered video into Premier to edit them out.

Post Effects

I have to admit, however, one thing that I have really enjoyed is the ability to create post effects live on a 3D scene. Typicaly if you wanted to render out depth of field or change the scene’s lighting, you would have to re-render entire shots, or render out a separate pass (a layer that would be used in compositing/post production phase). With the in-built camera effects, Post Process Volume assets, Atmospheric Fog effects among other things, you can do pretty much anything you could in After Effects directly in engine, in REAL TIME!

Shocked Face.

Colour correction, camera shakes, even adding particle effects like explosions or gunshots are as easy as dragging and dropping the required effect into shot and attaching them to the required bone or socket.

Now I’ve got to say, I have only experimented with this, using the basic presets and not delving too deep in how UE4 can be used as an effective and time saving tool for Previs, Cinematics and animation production. I havent even looked into integrating sound effects! But when I look beyond the flaws I have found and learn to use it as it is intended (rather than trying to shoe-horn a Maya scene and workflow into an engine), I think this has a lot of potential, and look forward to delving a little deeper into what UE4 has to offer visual storyteller.


Anyway, that’s it for this little four week experiment. Hopefully next I’ll get round to doing a bit more fiction. We will see.

Have a WONDROUS weekend, Y’all!


Oz

PRODUCTION DIARY OF [CENSORED DUE TO NDA] – WEEK 3 – Mocap to Character, Previs and Mistakes.

Let me start by saying this.

Directing a mocap shoot is fun. It’s tiring – I mean it really took it out of me – but it was fun.

Sifting through all of the data, trying to find the best take is not fun. It’s just tiring.

I suppose it is like sifting through hours upon hours of film footage, watching the same shot again and again until you have decided which take you prefer. In fact, that’s exactly what it is.

Luckily I had my trusted spreadsheet. I had made a couple of notes here and there to help me know what I was looking for, and which takes I preferred during the shoot. Though I have to admit, I ignored this once or twice, choosing other takes over the ones I had previously suggested.

From Mocap To Maya

It took me a couple of days to export all of the takes I felt I wanted. In MVN Studio, exporting an fbx is easy, and when brought into Maya would either be shown as a HIK (HumaIK) skeleton, or a bunch of Locator nodes in a hierarchy (depending on your export settings).

Transferring the data onto the character rig using HIK is as simple as creating two character definitions, one for the character rig and another for the mocap, and setting the character definition to be driven by the mocap definition. If I set this up with the character and Mocap data referenced into a file, I can replace the referenced mocap with a new one, and the whole thing would work nicely, without having to set up the definitions for every file.

When working with a character that has its own control rig, all you need to do in addition to above is parent/point/orient (depending on any hidden or frozen channels) constrain the controls to the HIK rig being driven by the mocap data.

Finally you can bake the Mocap data onto the HIK rig it is driving, move those keys out of the way (the data I was dealing with tends to like to start at frame zero, and referenced keys dont like to be shifted, so shift them out of the way, usually sub-zero), replace the reference with the next load of Mocap data, bake to rig, shift it, replace mocap, bake it, and so on and so forth.

Now I know this may all sound like a confused blur, especially if you are not familiar with Maya. but that’s fine. I’m happy for you to gloss over that bit. The truth is that all week I have been working with mocap data which has been slow and quite irritating to work with, and now I am tired and fairly desperate to get away from the computer for the day! I’m literally writing this, not as a tutorial, but as a way of covering the bases.

One this is for sure, I miss key-frame animation.

Previs

So Layout, in case you’re not aware, is basically the term used for placing cameras, whitebox environments and characters in place, creating a scene that will eventually feed through to the final piece.

Myself and our Intern, Calamity Joe, decided we would do the layout in two different ways. Calamity would get everything into Unreal Engine as soon as he could, opting to use the Sequencer to create the layout. instantly he has the animations, and can seamlessly blend from one to another if he needs to edit them. He can place the characters on a per-shot basis, with great looking lighting and atmosphere effects at the click of a button. He can choose to edit his scene in the Sequencer Timeline as simple as pushing shots around in and editing software.

I, on the other hand, decided to be old school and do everything in Maya.

Big mistake.

On top of that, I chose to do everything on a per-character basis rather than a per-shot basis, meaning I am compiling the entire sequence of shots in one maya file for Hero-A (name changed due to NDA) and a second maya file for Hero-B (name changed due to NDA), opting to reference the Scene file (which has the camera work and prop layout in it) and any other files I need into the files I was working for.

Now I know that doesn’t read well. I reads as straight forward as the process feels.

Bangs head against the wall.

And Why? why bother doing it this way and give myself a headache? Well, my background is in hand-keyed animation. When doing layout with hand-key, you have full control over timing, positions, movement. You can tweak as you go if you’re not happy with something, but when you have mocap data to deal with, especially mocap data that doesnt fit with the timings you’re after, it’s really not that simple any more.

But do you know what? Despite flipping from file to file, chopping up motion and roughly sticking it together, despite spending ages waiting for keys to shift or scale, I’m quite happy with the outcome; the layout looks like the storyboard, and though I know certain motions need to be cleaned up, or transitions need to be made smooth, as proof of concept, the piece works.

An Iterative Process

My favourite element in all of this has been sorting out the cameras. I love being able to  frame what the audience will see, to tell stories with how action is framed, and also use tools like focal length to draw out different feelings in the shot. I know the camera work will need to be recreated in UE4, and that’s fine, but all of the creative work is done, and the because of this, the layout works.

Now you cant animate the cameras before you have the characters in, otherwise you are not sure what you’re shooting, and you cant finalise the characters until you have a decent camera pass. As such, this was a very iterative process, getting the rough estimations down, planting where the camera could be, then playing with the characters, tightening up the cameras, then tightening up the characters. Going back and forth until I had something more polished than it was before, seeing things that weren’t working suddenly look good.

And after all, isn’t that what the creative process is all about? Start off messy and sculpt the lines. My old tutor, he’s not on our project, so I have no need to give him a false name, but I like to do that anyway so lets call him Harvard Tewkesberry, once told me that animating is like making a cake – you have to get the cake down first – that is the main bulk of substance – before you do the icing – that is the detail and polish. And for me, making a cake has always been a messy affair.

Still, I am encouraged when ever I see something go from being a complete mess to being a cake. Something of substance. Something that looks good, and has potential.

And that’s where this project is up to now.

I am going to do some tweeks and get a playblast into Premier Pro, where I will try to tighten the edit, make it look and feel better, I will then make any changes required in Maya, and get things ready to throw into engine next week.

Sleep time now.

Oz Out.


PRODUCTION DIARY OF [CENSORED DUE TO NDA] – WEEK 2.2 – Motion Capture Fun!

I have always been quite an active fella. Sure, my skills at a sport or a martial art were never up to scratch (I downright refused to play football during PE at school) but my preference was for the arts; drama and dance, something with a little more storytelling (though I struggle with contemporary dance as a means of storytelling… just the thought of it is making my skin crawl).

I have done drama in one form or another pretty much throughout my life, I know how to act. I am also a keen swing dancer, having taught the Lindy Hop and Charleston (social dances of the 1930’s and 40’s) for the past six years.

Dancing_Censored
My wife and I dancing at a Swing Dance Weekend. Censored just to stick to the theme of the post.

My point is this: I know my body, I know how to move it, and I have great control over it.

Or at least I did.  Until I wrecked my knee.

At the start of December just gone, we had a Snow Day! Everyone was having fun, frolicking about in the freezing cold, throwing balls of crystallised water, and building men out of snow. And I did something stupid and popped my knee cap out of place.

Damn well hurt as well.

knees_Censored
Image Censored due to icky swollen knee. In fact, censoring it makes it look worse that it was.

Unfortunately for me, this meant I couldn’t walk for two weeks whilst it healed. And four weeks later, after the joys of Christmas and the New Year, it still isn’t 100% – I struggle kneeling and running, and my knee grinds like grit in a gear when straighten it!

Sadly this meant that, as much as I would have loved to, I could not be the one in the MoCap suit when recording movements. No matter how well I could have performed the twisted walks of the monsters, the timings of the actions and reactions, no matter how much I would have enjoyed it all, my gosh-darn knee wouldn’t allow it.

Sad face.

Motion Capture Days

Being part of one of the smaller (but definitely expanding) games studios in the UK means we do not have a large Motion Capture studio to do what we want in. And for quick little projects like this one, there is no point renting out a studio and hiring actors.

However, we do have a boardroom, a portable inertia-based mocap suit, and an intern.

For the majority of this week I have been stuck in a boardroom no bigger than generously sized living room, with two sick guys. My Lead, DJ Jazzy McJizzle, was producing mucus like a Hagfish, and Calamity Joe (the intern), was streaming from every hole in is face. Mr McJizzle was the worse of the two, hands down, and had seen a good number of trips around the Sun than Calamity. And I hand a duff knee, so there was no way I was running around the room. Unfortunately that meant that the responsibility of acting EVERYTHING fell down to the intern.

MoCap_Censored
Calamity Joe all suited up with our professional-grade rifle prop.

We had two 35 second animatics to capture, each with six characters performing similar typical soldier-style movements; running with guns aimed, crouching behind cover, deaths, jumps, all that sort of stuff. With only one mocap suit and just enough room to get a decent run cycle, we had to be pretty creative with how we were working. Luckily for us, the characters don’t really interact with each other (other than through a stream of bullets), so that was less of a problem, and we were able to separate some longer traversal shots into multiple takes, but keeping tract of which character is doing what and at what point was akin to playing chess against yourself. Playing every movement of one piece, then every movement of the next piece, then every movement of the… well, you get the idea. And for this reason, I was remarkably thankful I had taken the time to plan each take and each shot as carefully as I had.

We were using the Xsens MVN Link Motion Capture solution, which was really easy to set up, and a lot more stable than the MVN Awinda (which is completely wireless and glitchy A-F). The entire thing comes in a little carry case, and is basically a lycra suit fitted with inter-cabled inertia-based motion trackers that speak to your computer via a simple receiver. MVN Studio Pro, the software that allows you to record all of the data, is easy to use, and allows you to watch the data onscreen in real time. Magical.

MVN Censored
MVN Studio, Pro. Censored.

Because we were capturing the two storyboards I had worked on, I took control of the direction. For every take we recorded, I was speaking Calamity Joe through what was going on, what he needed to do, what role he needed to inhabit, what physical movement type he needed to portray. At times I was just talking to him directly throughout the take, trying to get the best out of him for timing, processing time and reaction. I was trying to inspire him to give a good performance, and though I would say our intern is no actor, I think he did a really good job. By the end of it, had come a long way in his performance.

On the first day, we set up in the morning, shot through til lunch. Had a break. Could not get up again. Motion Capture, both acting and directing, is fun, but damn it was tiring. Consider a bunch of guys who sit behind a desk all day every day being asked to be active all that time, to interact with each other in quite an intense way.

Now, as I said before, I taught a dance class one night a week for six years. Each night was two hours of me shouting at people and making them laugh, whilst hopefully getting them to understand certain elements of body mechanics and how certain movements can cause other movements, resulting in a dance move. After each class I would be buzzing, but after I would realise just how much of myself I had given. Let’s just say I slept well.

I also taught two two hour animation workshops at an industry week once, focusing on the mechanics of a single jump, how to watch reference, dissect movement and exaggerate that reference to create something that is both cartoony yet believable. Each class was filled with energy and excitement and humour, and after, when I could sit, I would realise how much of myself I had given. And I was shattered.

It was the same with Motion Capture. I was tired, I was drained. and I had to go back in there to do an afternoon session. Maybe I can only do that sort of stuff two hours at a time.

Never-the-less, three days in a small room with two sick guys later, and we were able to capture all of the takes we needed. the next step? To review those takes, find the ones that fit best, and to apply them to the characters.

Anyway, that’s next week’s story. It’s Friday night, and I have done my work for the week. Time to go home, crack open a beer and relax! 😀

Have a great weekend everybody!

Oz

PRODUCTION DIARY OF [CENSORED DUE TO NDA] – WEEK 2.1– Some More on Cinematography, Animatics and Mocap Prep

Just throwing this out there…

This Production Diary entry is gonna be less about what I did, and more pointing out a couple of techniques and other things I am aware of whilst doing the work.

So probably a little less ‘funny-funny-har-har’, and more ‘hmm… I see’.

But Hey! let me tell you a couple of things I have been keeping in mind whilst doing the prep for this short project.

Cinematography

So we have an intern at the moment. For the sake of Witness Protection I’m gonna call him Calamity Joe. So Mr Calamity Joe was given one of the five storyboards to draw up. He spent a day drawing and sketching and generally getting on with it, but when it came to presenting his work to our Lead, DJ Jazzy McJizzle pointed out something of fierce importance. Fierce.

This storyboard was somewhat… well… two dimensional.

You see, what Calamity Joe did was read McJizzle’s scene treatment and, with some creative expansion, draw the actions. He drew what he knew the characters to be doing in the scene as though he was watching it on stage, from maybe one or two different point of views. McJizzle pointed Calamity in my direction.

He called me to his office and slammed his fists down on his desk with such vigor that the pencils and little desk-things sat thereupon leaped for fear. ‘Teach this boy some Cinematography, Dammit!’ he spat through a clenched jaw, his near-spent cigarette almost flying from his mouth.

That previous paragraph was completely fabricated. But the sentiment was there.

The point is this; I hadn’t put too much thought in how I used the visual language of camera angles and composition in the shots, of how the story is read from one panel to the next, or how those things have been used to adhere to the audience’s understanding of media. I had to try to inspire Calamity Joe with certain tricks and rules of cinematography, which I did in drips and drabs throughout the day, as and when I remembered them. Most of these small lessons were ended with ‘If that’s the feel you are going for’, rules that may or may not be kept when thinking through storyboards, depending on what you want the end result to be.

I advised him on rules like the 180 Degree Rule (‘for example in this conversation between us two’ I said, ‘You’re filming each of us as we talk, changing angles to focus on each character – I am looking Screen Right, you are looking Screen Left. Imagine there is a line between us  that the camera SHOULD NEVER PASS. Passing this line would mean that I am looking screen right, then you would be too! The audience would get confused and fall over. NEVER do this. Unless it is intentional’), Continuing Movement Directions (‘if a character ends a shot travelling Screen Right, then appears in the next shot travelling Screen Left, the audience would become angry and start burning things.’ I advised, ‘They would think the character has forgotten something and retraced his steps, or think that more time has passed than intended, not linking the two shots together as easily as they should. ALWAYS continue movement in a similar direction. That is, of course, unless you don’t want to.’) and the effects of low versus high angles (‘Looking up at a subject gives it power, looking down makes the subject look small and less significant’) and Field of View (‘Where the background is in relation to a subject can convey different emotions to the audience. A narrow field of view – where the background feels close – would make a shot feel more flat, and at times more comfortable, but a wide field of view – with a distant background – could make the subject feel lost, or bring us into the personal space of the subject, possibly into a mental state. Use these rules wisely to create certain feelings.’ I said ‘Or don’t. It depends what you want to achieve’).

I told him the secret to what I do when thinking up camera angles. I sit. I close my eyes with my pen in hand, and I think ‘If this action was in a movie, like a really cool movie, with really dynamic cameras and all that, what would this shot look like?’ I focus. I explore the scene, and I draw what I see.

In truth, I don’t think this piece of advise made any sense.

Animatic

One of the most challenging parts of converting a storyboard into an animatic is the editing phase. That is not to say the process of chopping clips and fixing them together into a coherent sequence of shots (that part’s easy!), more to say the creative process of saying whether a shot works, whether it needs to be in the cinematic or not. During the editing phase of one animatic, I had to cut two entire sequences that I had story-boarded. This was not because the shots didn’t work in general, but rather to stick to the time constraints and keep to the natural flow and pace of the piece.

Secondly, movement adds so much to the rhythm of a cinematic; using the minimum still images (that is to sell the shot and movement without drawing out inbetweens) made timing some shots quite difficult. Therefore I have been working on timing estimations, allowing myself to be flexible once the motion has been captured.

In the same frame of mind, it is sometimes important to go back to the drawing board. Sometimes to redraw entire sequences, sometimes to add some new shots – if the shot showing the characters walk into position isn’t working from a top-down angle, maybe from a distant side-on angle would work better. Equally so, sometimes you need to add inbetween sketches to truly sell a shot. Just because you have entered the exciting world of the editing program doesn’t mean you have given up the pencil.

One thing that I have found quite important is the amount of time you give the audience to ‘read’ a shot. If we cut between different shots, the audience needs time to read what’s going on in that shot before you can move to the next. This can change the pace of a piece without you knowing it, and it comes down to composition.

Imagine the first of three shots is a long shot with a lot of stuff going on, but the main focus (due to lighting, colour, screen-space, what-evs) is to the screen right. The audience would search the frame to see what needs to be seen. This is typically done quite fast. If you cut to the next shot, where the action happens in the upper left of the screen, the audience would have to search again to see whats going on. If this second shot then cuts to the third – lets say a mid shot of something central – too fast, the audience may not have time to search the frame, and therefore it would be a forgotten (or worse, confusing) shot. And if the audience don’t see what you want to show them, what’s the point of the shot?

One way to get past this would be to have the second shot on screen for a little longer. However, this might change the flow or pace of the piece, in which case we need to rethink composition. If the focus point in all three shots were in the same place – let’s say dead centre – you could cut between them as quick as you like (well… within reason) without overly confusing the audience. Why? because they would already be looking in the correct place for the next shot – they won’t have to search the frame, and so can read it quicker. A lot of fast paced cuts in action films use similar focus points from one shot to the next, just to help the audience read it easier.

Breakdown Document

Well Gosh. It seemed that last week I failed to mention enough about the storyboard breakdown than I had hoped.

In the breakdown Excel sheet I have listed every Shot by Number. After the number we have a Description of what is going on in that shot, you know, your typical ‘Med Shot on [insert character] as they [insert action]’ sort of thing. Following that is a Thumbnail of the storyboard panel, a list of the Actors in the shot, and a list of their Actions in that shot. Finally there is a space for Notes, most of which are blank apart from the occasional ‘Can use the Mocap data from shotX’ and the like for when multiple shots (or characters) are performing an action the same action.

Now this is all well and good an hunky and dory, but doing a mocap shoot on a shot by shot basis can quite easily give you a stupid number of captured files and a LOT of data to flick through. This might be good practice when Mo-capety-capping for games, where each motion needs its own animation file, but when doing something more narrative led, I figure we should string the actions together as best we can, and edit them as we wish in Maya.

For this reason I have added another section to the Excel sheet, showing the linked actions (that is, the actions bridging multiple shots) by character. In this table we have the Name of the character doing the actions, the Take Directions, the Shots which those actions bridge or are included in, more Notes, and then finally a Takes column, to be filled in as we record.

Needless to say, it is pretty dickety-darn important to be well prepared for a mocap shoot, or any other shoot for that matter. If you’re not prepared, people will sit around with their thumbs up their arses whilst one person tries to imagine what they want. And when you are in a situation where you have multiple characters being played by one actor, it becomes a nightmare to keep on top of everything.

That is, of course, unless you are Prepared.

Be prepared. Make a spreadsheet.

Being organised in this way will avoid wasted time, wasted money and wasted stress.

Spreadsheet = Organised = Happy Happy Fun Time.

No Spreadsheet = No Organised = Terror.


And with that, I’m gonna stop writing. heers for reading, let me know if this informal rambling has been helpful or informative in any way.

CHHHEEEEERRRRSSS!!!!!

Production Diary of [CENSORED DUE TO NDA] – Week 1 – Storyboard and Animatic

This year (well… week, really – 4 days if you want to be specific – Monday was a Bank Holiday) I have been mostly spitting out sweet storyboards, filthy and quick, for a short cinematic project that will probably only last a month at most. I wanted to keep a production diary of the process, but realised that, due to the nature of the game industry and the Non-Disclosure Agreements signed, all of the work would have to be censored.

I decided to not let that stop me.

So we have been working on [NAME OF GAME CENSORED DUE TO NDA] for around 6 months now, and have got to a certain stage in production where we are starting to think about ways in which to introduce the enemies of the game. My Animation Lead – for purposes of anonymity I will give him a pseudonym, let’s call him DJ Jazzy McJizzle – suggested we needed a video introducing each enemy type. Something that would demonstrate their individual behaviours and powers, something that would show how they should move before getting too deep into the games production.

Now DJ Jazzy McJizzle had written up some short scenarios for each of these cinematic tests, see below for an example of one of these emails.

emails - censored

With this knowledge, I was well on my way to creating a scene, shot by shot, based on the brief. It was nice that the brief was rather vague, allowing myself plenty of room for artistic interpretation, which is, coincidentally, my favourite type of interpretation. I have the bare bones of a story, it was up to me to flesh that out with pictures!

So I got myself a HB Pencil (other Graphite Grades are available) and a wedge of A4 paper (‘wedge’ being the proper collective noun for A4 paper) and started sketching to my hearts content.

Now I don’t mean to blow my own trump, but I think I have a good feeling for cinematic camera angles, timing and pacing. I can’t really describe why, but I knew how these storyboards should feel. Maybe it’s due to an intern power, an eye for detail and visual storytelling. Maybe it’s due to over exposure to film, animation and video game cinematics.

Either way I bossed it like a bee-sting.

Check out my censored storyboard sketches below.

Sketches - censored.jpg

As you can (can’t) see, the sketches are just that – rough scribbles and many many circles. The compositions in these shots are not perfect, but they serve as a good guide for what I needed. as I mentioned above, this is a very quick turn around, so we like it rough. Rough is good.

I don’t like straight lines.

Once DJ Jazzy McJizzle approved the overall arc, the individual compositions and the flow of the panels, It was time to transfer these into the computer by force, and finalise the compositions.

Using the ‘fist-through-the-screen’ technique taught in deep Afrique, I used the sketches as guides, and photoshopped the heck out of these little beasts, redrawing the whole thing a quick and filthy as I could, not taking time to make every shot a pristine work of art, but something that suggests form, something that gives the impression of the movement and action of the subjects we are watching.

photoshop - censored.jpg

Here is a screenshot of the Photoshop file. One challenge I faced was how to make these panels look good, work effectively, and yet still take no longer that maybe 5 minutes per shot.

The answer – Circles.

Lots and lots of circles.

Scribbling circles has been a form of art since before forms of art were a form of art, and using this technique, I felt one with my artistic ancestors. The idea is that you basically move your Wacom stylus around in circles of varying sizes until it kinda looks kinda like something you kinda want. Then go in with the eraser tool to sculpt it into what you actually want. Finally use a lighter tone to build up more or a 3D form onto the piece. At this point I was at liberty, nay, I was positively enforcing upon myself, the option to lasso, transform, flip, twist, duplicate, motion blur, liquify, all of those wonderful peaches, to get the composition I and feel I wanted as quickly as I could.

One thing I found a lifesaver was a grid. I used a grid in each panel (sometimes even two or three grids, but NEVER 4!) to give me a level headed perspective on life. I transformed the grid into whichever perspective I needed (using CTRL+SHFT+ALT in Free Transform Mode).

This is a good thing to do.

I think I will do it again.

Great examples of grids can be found here:

https://www.google.co.uk/search?q=grid&source=lnms&tbm=isch&sa=X&ved=0ahUKEwjmvPSHrsHYAhVrIsAKHU2VB8AQ_AUICigB&biw=1098&bih=730

Once I was happy with all of the panels, I flattened each frame and saved the whole storyboard as a .PSD. Dragging the .PSD into Premier Pro allows you to import all of the layers of that file. Magic.

Then it’s just a case of dragging and dropping the panels onto the timeline and editing it down to feel right, giving the correct emphasis on each panel, making sure the pacing agrees with the action (or lack there of), and trying to adhere to a strict duration limit.

premier - censored

I would upload the 35 second animatic, but unfortunately all of the visuals are under NDA, so you’d be left with the audio only on a black video.

In fact the audio is also under NDA, so I have recorded all of the sounds by mouth for you to listen to.

You know what? This is getting silly. I’m just not going to upload a video.

Needless to say, these animatics went down very well, and along with a breakdown noting what actions are needed per character per shot, we will be using this to capture some motion using motion capture techniques (insert image of self with a butterfly net, lol, like, you know, using the net to capture the motion, as though motion was a physical item or creature that you could catch with a net. Lol. sooooooo funneh). But that’s a story for next week.

GOOD BYE, and HAVE A GREAT WEEKEND, YOU!

Oz

Oz and Kate Wedding – Guest Illustrations

So a number of you may have seen that in May of last year I got married!

First off, I have to say it was an incredible day, not only for what it meant to my wife and I as a couple, but also because of the amount of fun everyone had on the day.

As you can probably imagine, being an animator and cartoonist, and that being an intrinsic part of who I am, I wanted to do something that would reflect that part of me. I created a funny little video to entertain guests as we signed the register (which went down VERY well) and also posted a video about the rigging process used for the animation parts of the video.

This post is not about the animation.

This post is about the illustrations.

Specifically the illustrations of all of the guests.

As is typical of modern weddings, it seems that every guest invited to the meal and speeches need a ‘favour’ – a little gift or trinket for them to enjoy as they take their seat. Usually these are some form of name place or chocolate or something hand made. I decided I would create drawings of everyone. There was 73 of us.

The original thought was to create meeples (or board game pieces) of the guests. Adopting the visual style already laid out through the wedding invites, that would also flow into the wedding ceremony, I would tweak the faces to the likeness of each guest, The only problem was how minimal the features were in the visual style being used – simple black dot eyes, big smiles and hair, no noses or ears. not a lot to go with. See the invites below.

So here is a photo of the final product. All of the guests (and a Bride and Groom Cake Topper) produced as cardboard play pieces.

all_finalpieces.jpg

It was a tough challenge, finding reference images of each guest, figuring out how to make a likeness in the pre-set art style and colour match it all, but I was (and still am) proud of what I achieved.

Below is a gallery of a few of my favourite designs.


if you want to check out all of the individual faces, I have placed them below.

AllGuests.jpg

As I mentioned above, one of the reasons Kate and I had such a great day was because we saw all of our friends and family have a wonderful time. These little illustrations helped make it. The guests were allowed to keep their picture (I have a duplicate for myself), and have seen a number of people frame their pieces, place them as ornamental pieces. even change their social media profile pictures to these.

I myself have used mine as a new form of personal branding.

(HOPEFULLY I WILL GET ROUND TO ADDING A GALLERY OF THESE PIECES AS THEY WERE IN SITU ON THE DAY)

Anyway, I hope you like the work! thanks for reading!

Oz

The Irrefutable Wisdom of Mr Think Chapter 1, pages 11 to 15

Well it has been a while, but I have finally passed my 15 page milestone! woop woop!

CHECK IT OUT HERE!

So what can I say? What have I been working on that takes precedence over my webcomic? well, if you haven’t checked out the ‘Hope’ project I did, then go ahead! that took quite a lot of time out of my daily commute to draw each panel for the animatics there, and considering that was for a live event, it was both important and urgent.

What else? Well for a while I have been working on another based in a fantasy setting, something code named ‘FCT’. Having been inspired by Chris Oatley’s blog and podcast, I have decided to produce an animation Pitch Bible for it. I have spent time designing the characters, developing their bios and how their personalities interact, and coming up with an overall story-arch as well as individual episode synopses. This has been a really fun project for me and I hope to get the pitch finished before the new year! I’m planning to send it out to a couple of places/people to see what they think and if they are interested, so I won’t post it straight away, but may show off some of the illustrations.

What have I learned about Mr Think? Well… I have learned that I DO NOT like to draw backgrounds, that I DO like to draw beaten up faces (some of the faces on pg15 really made me laugh) and that I need to challenge myself to get better at drawing dynamic poses and dynamic camera angles. I have tried so hard recently to make each panel a little more interesting without making the characters look like a melting Stretch Armstrong. However, I think the designs of my characters have matured a bit, become a little more simplistic and effective (though after taking a little while off, I kinda forgot how to draw any of the characters).

What is next for Mr Think? Well… I think I have another five pages left of this chapter. So the average comic has 22 pages. I could probably do that before the chapter is out. lets see how that goes, and then it’s on to chapter two.

You see, this chapter is all about introducing the main characters, Think, Honeydue and Cartwrite. The next chapter is about their relationships. After that, the third chapter should provide some form of conclusion… but lets see how that goes. I am kinda doing this as I go, I have a rough plan, but new ideas add to it, subtract from it, and shape it into something different to the original premise.

But for now, I’m gonna mix my focus on this and FTC. I have my dayjob as well, a little games jam idea to work on this week and half of next, and am planning on joining the Leicester’s Writers Club, which would take my Thursday nights away from me. Wish me luck, and I will post an update for Mr Think after I have my next five pages for you all!

As ever, feel free to post a comment, show me some love or buy me a coffee!

Cheers

Oz

Questions Nov17 | Hope Adverts

Over the past three months, a small team of volunteers have been working hard to produce an evening of entertainment. Over the past two nights, this work has been presented to over 400 people in the form of videos, plays, music and discussion panels.

The ‘Questions’ event is an initiative of Holy Trinity Church, Leicester, a church that I  am an active member of. The evening is meant to be an evening of entertainment around a set theme, to invite people unfamiliar with churches in and help them consider the bigger questions in life.

This time the subject was simply ‘Hope’.

Now that is quite a broad subject, and it took us a good two of the three months to actually come up with any ideas that had legs! We were running quite close to the line, and then had a couple of break-throughs; ideas and sketches seemed to click into place, scripts got written and re-written (and re written), and with two days to go before the first night, we had our first script run though.

Needless to say we were all quite stressed.

So the event ran last night and the night before, and I have to say, we got a lot of positive feedback. The audience seemed to really enjoy the entertainment and get engrossed in the discussion panel. we got the laughs when we needed them and held their attention throughout the night.

My role was as a volunteer on the creative team. I came up with idea after idea, bouncing them off the rest of the team and seeing what stuck. In the end, a school of thought that there are four main ‘hope’ personalities (False Hope, Real Hope, No Hope and Lost Hope, https://en.wikipedia.org/wiki/Hope#Hope_theory), inspired a set of adverts posted below.

In these adverts, each hope type is advertised as a soft drink. taking tropes from some modern adverts, I sat on my train commutes to work and sketched away, making storyboards and finally the Animatic style videos below. And yes, that is my voice throughout.

From here the idea evolved. We would show the Hope Maxx, Hope Noir and Hope Zero adverts in between other slots throughout the night, finally coming to a head in a Dragon’s Den sketch which I wrote with the help and input from the rest of the team. The script can be read below. On the night(s) I played the part of the Pitcher (Hopeford Hopeington).

Dragons Den

Another script I wrote that wasn’t used can be found here – Bingo!, the idea was to play Bingo, once to show a rising hope as the numbers were called out, a second time to show diminishing hope where you were out once your number was revealed. The sketch focuses on a winner, and was unfinished, but used as a basis for something a little different. I though the premise was good enough to post, so feel free to give it a look!

So that is that! The end of Question until the next mad dash to fit in idea generation, script writing, video making and acting. It’s a good job I love doing it!

Cheers

Oz

7 Days of Pete Spotting

This is going to seem weird, but I’m ok with that.

Today I photoshopped my friend’s face onto every character on the Thor: Ragnarok movie poster.

ok, let me back up a little bit. A few months ago someone at our church needed to borrow an inflatable bed. My wife and I could help her out, and she got in contact on Whatsapp. Having never met her before (it’s quite a large church), we posted a photo of ourselves and told her to say hi if she spotted us.

This started an influx of our friends ‘Spotting’ us – taking stealthy pictures of us and posting them on our whatsapp group with the word ‘Spotted’. One of the main culprits was a guy called Pete. After a number of his posts, I thought I’d get my own back. One night, at church, I took a photo of Pete, and this is what I did with it.

The following is my story of a week of ‘Pete Spotting’ as I posted it for 7 days on Whatsapp.


A Week of Pete Spotting. Day 1.

Yesterday I spotted the infamous Pete at a church service. I couldn’t help but take a photo to prove this, but it got me wondering, where else could I find a Pete?

Today I kept my eyes peeled in case I found another one. And I did. Today I spotted a Pete training an Elephant at the zoo!

Makosch Zoo

I wonder where I might spot him tomorrow.

This got a bit of a laugh. So I thought I would continue.


A Week of Pete Spotting. Day 2.

As a child, I always watched CBBC hoping someone had sent a surprise birthday card in for me. Even on the days I knew it wasn’t my birthday.

This is something I still do. And you wouldn’t believe who I spotted!

Makosch CBBC


A Week of Pete Spotting. Day 3.

Well, I think it’s just perfect timing that it is Pete’s birthday today. And would you believe it, I just spotted him down the pub. I don’t know how much I had to drink, but I’m sure I was seeing double of seeing double!

Makosch Pub


A Week of Pete Spotting. Day 4.

I was asked by my parents to go through my old stuff today. Amidst the dolls and hoop-and-sticks I once played with as a child, I came across a score of old posters I once used to adorn my bedroom walls. When I looked closely, you’d never guess who I spotted!!

Makosch Zone


A Week of Pete Spotting. Day 5.

My travels have taken me far and wide. Whilst going about my weekly shop, I was shocked to spot these in the Japanese Supermarket!

Makosch Market

This proved a little subtle for some of my friends, but he’s in there 8 times!


A Week of Pete Spotting. Day 6.

Simply put – Spotted whilst researching historical art.

Makosch Tapestry


A Week of Pete Spotting. Day 7.

It has been a long week of Pete Spotting, and today it comes to a close. Having spotted Petes in many different places, it almost feels like I have trained my mind to spot Petes where Petes may not be. I look to the stars to ease my mind, and wonder at the planets, stars and nebulae. But then I see it. Oh goodness, I see it! Will I ever Stop Spotting Petes!?!

Makosch Nebula


Well… that was a few weeks ago. My friends told me how much they had enjoyed it, the images making them smile every single day that week. And I enjoyed creating the images, just to do something that really amused me! And I hope they amused you too.

Today something I was looking forward to fell through, and I felt somewhat disappointed about it. I mentioned it to my church friends on Whatsapp, and they were all really encouraging and wanted to make sure I was ok. Here’s my response.


So I have to admit, I’m pretty disappointed. So I thought I’d cheer myself up by looking what films are currently playing…

You’ll never guess who I spotted!!!

Makoschnarok


Hope you’ve enjoyed this little tale of photoshopping the same face on many people. It can be fun!

[CRITICAL ROLE] THE BLACKSMITH PALADIN PORTRAIT

Sorry it’s taken so long – it’s been a while since I started this piece, but I’m happy with it now!

But this here is tribute to one of the wisest, most down-to-earth and likeable characters in the whole thing! Kerrek as played by Patrick Rothfuss. Love this character! you can probably tell that my strengths are in painting faces from reference than anything else.

CR Kerrek.jpg

Not done a WIP Gif yet… sorry!

Cheers guys!